

Object Detection Tutorial in Tensorflow
Last updated on 26th Sep 2020, Artificial Intelligence, Blog, Tutorials
What Is Object Detection?
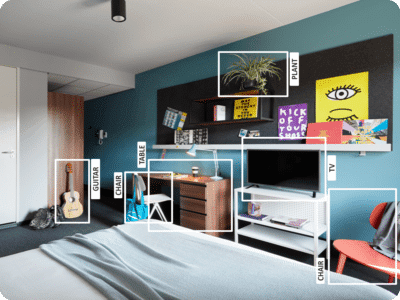
Object Detection is the process of finding real-world object instances like cars, bikes, TVs, flowers, and humans in still images or videos. It allows for the recognition, localization, and detection of multiple objects within an image, which provides us with a much better understanding of an image as a whole. It is commonly used in applications such as image retrieval, security, surveillance, and advanced driver assistance systems (ADAS).
Object detection can be done in multiple ways:
- Feature-based object detection
- Viola Jones object detection
- SVM classifications with HOG features
- Deep learning object detection
In this object detection tutorial, we’ll focus on deep learning object detection as TensorFlow uses deep learning for computation.
Applications Of Object Detection
1.Facial Recognition

A deep learning facial recognition system called the “DeepFace” has been developed by a group of researchers from Facebook, which identifies human faces in a digital image very effectively. Google uses its own facial recognition system in Google Photos, which automatically segregates all the photos based on the person in the image. There are various components involved in facial recognition, such as eyes, noses, mouths, and eyebrows.
2.People Counting
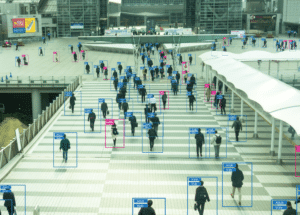
Object detection can also be used for people counting. It is used for analyzing store performance or crowd statistics during festivals. These tend to be more difficult as people move out of the frame quickly.
It is a very important application, as during crowd gatherings, this feature can be used for multiple purposes.
3.Industrial Quality Check

Object detection is also used in industrial processes to identify products. Finding a specific object through visual inspection is a basic task that is involved in multiple industrial processes like sorting, inventory management, machining, quality management, packaging, etc.
Inventory management can be very tricky, as items are hard to track in real time.Automatic object counting and localization allows for improving inventory accuracy.
4.Self Driving Cars
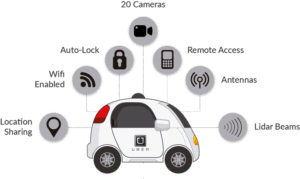
Self-driving cars are the future; there’s no doubt about that. But the working behind it is very tricky, as it combines a variety of techniques to perceive their surroundings, including radar, laser light, GPS, odometry, and computer vision.
Advanced control systems interpret sensory information to identify appropriate navigation paths as well as obstacles, and once the image sensor detects any sign of a living being in its path, it automatically stops. This happens at a very fast rate and is a big step towards driverless cars.
5.Security

Object detection plays a very important role in Security. Be it face ID of Apple or the retina scan used in all the sci-fi movies.
It is also used by the government to access security feeds and match it with their existing database to find any criminals or to detect the robbers’ vehicle.
Subscribe For Free Demo
Error: Contact form not found.
The applications are limitless.
Object Detection Workflow
Every object detection algorithm has a different way of working, but they all work on the same principle.
Feature Extraction: They extract features from the input images at hand and use these features to determine the class of the image. Be it through MatLab, Open CV, Viola Jones, or deep learning.
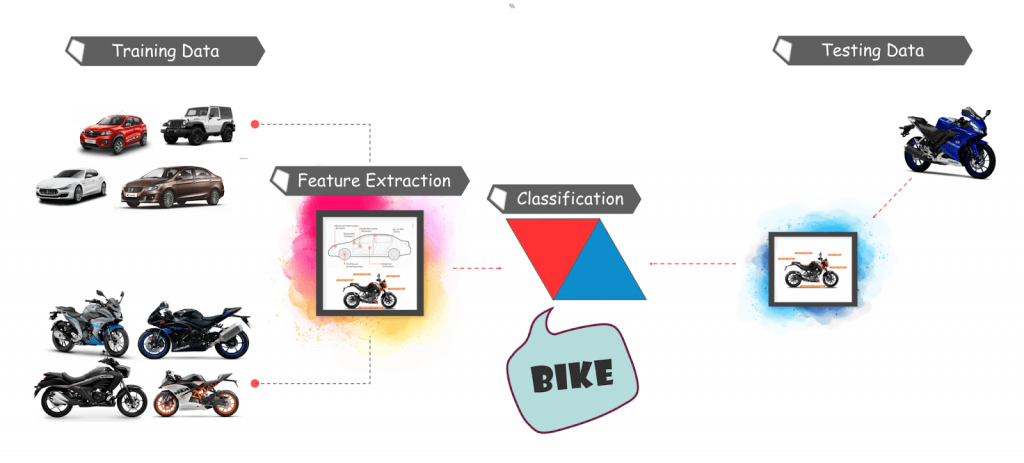
that you have understand the basic workflow of object detection, let’s move along to the tutorial and understand what Tensorflow is and what its components are.
What Is TensorFlow?
Tensorflow is Google’s open source machine learning framework for dataflow programming across a range of tasks. Nodes in the graph represent mathematical operations, while the graph edges represent the multi-dimensional data arrays (tensors) communicated between them.
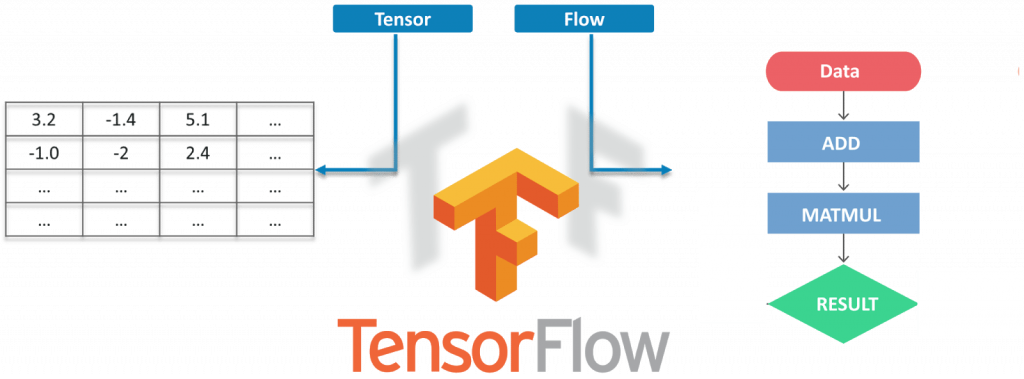
Tensors are just multidimensional arrays, an extension of 2-dimensional tables of data with a higher dimension. There are many features of Tensorflow that make it appropriate for deep learning. So, without further ado, let’s see how we can implement Object Detection using Tensorflow.
How does Object detection work?
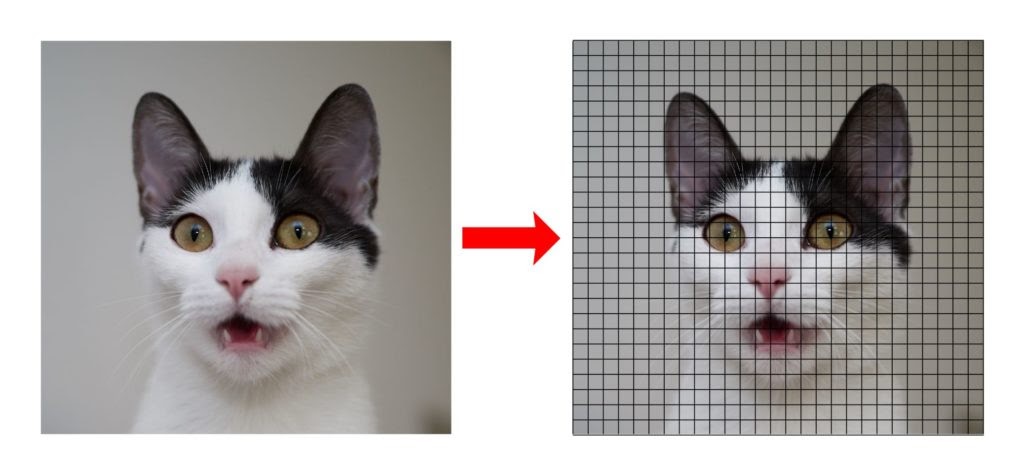
Generally, the object detection task is carried out in three steps:
- Generates the small segments in the input as shown in the image below. As you can see the large set of bounding boxes are spanning the full image
- Feature extraction is carried out for each segmented rectangular area to predict whether the rectangle contains a valid object.
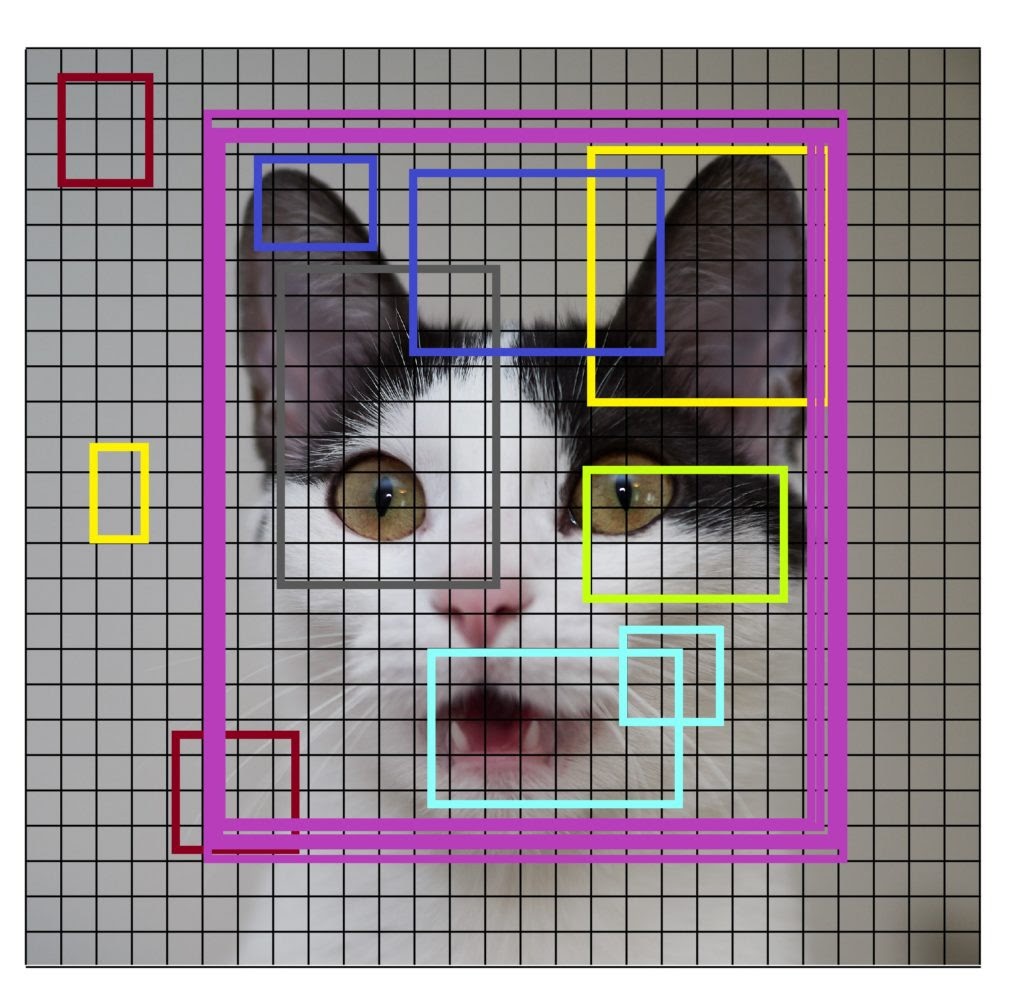
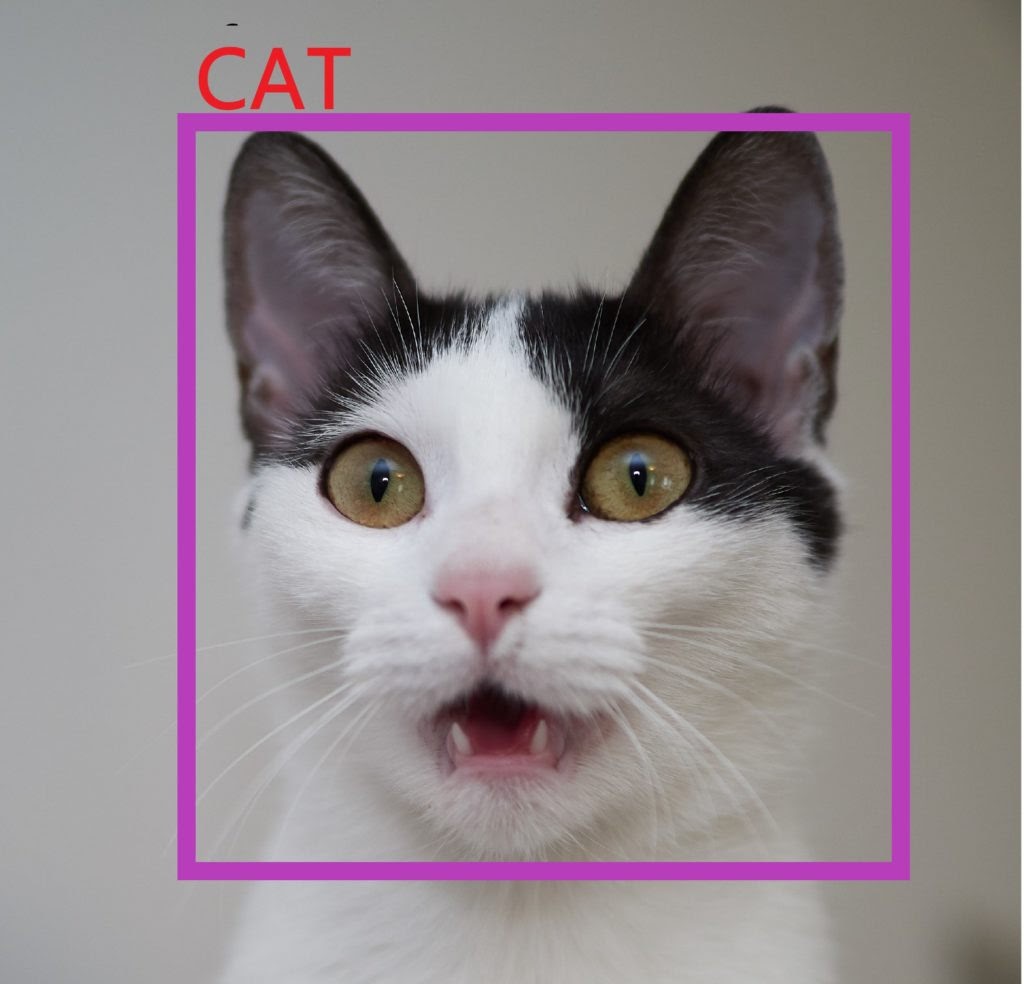
- Overlapping boxes are combined into a single bounding rectangle (Non-Maximum Suppression)
Advantage and Disadvantage of TensorFlow
TensorFlow is an open-source machine learning concept which is designed and developed by Google. It offers a very high level and abstract approach to organizing low-level numerical programming. And supporting libraries that can allow our software to run without changes on regular CPU.
It supported platforms include Linux, macOS, Windows, and Android.
TensorFlow models can also be run without a traditional computer platform in the Google Cloud Machine Learning Engine.
The more advanced technology, and the more useful it can be, but everything has its downside and also this machine learning library. When comparing TensorFlow with other libraries like Torch, SciKit, Theano, Neon, there are drawbacks in several features that the library lets us manipulate. This library is designed and updated by Google, so needless to say, and it has come a far way since its initial release.
Advantages of TensorFlow
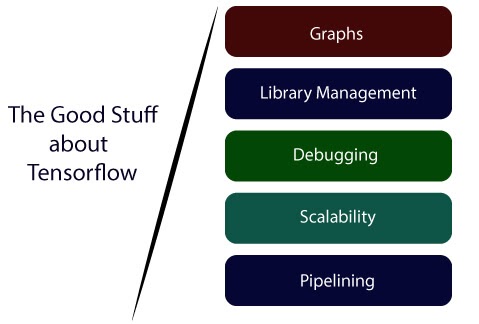
1) Graphs:
TensorFlow has better computational graph visualizations. Which are inherent when compared to other libraries like Torch and Theano.
2) Library management:
Google backs it. And has the advantages of seamless performance, quick updates, and frequent new releases with new features.
3) Debugging:
It helps us execute subpart of a graph which gives it an upper hand as we can introduce and retrieve discrete data
4) Scalability:
The libraries are deployed on a hardware machine, which is a cellular device to the computer with a complex setup.
5) Pipelining:
TensorFlow is designed to use various backend software (GPUs, ASIC), etc. and also highly parallel.
6) It has a unique approach that allows monitoring the training progress of our models and tracking several metrics.
7) TensorFlow has excellent community support.
8)Its performance is high and matching the best in the industry.
Disadvantages of TensorFlow
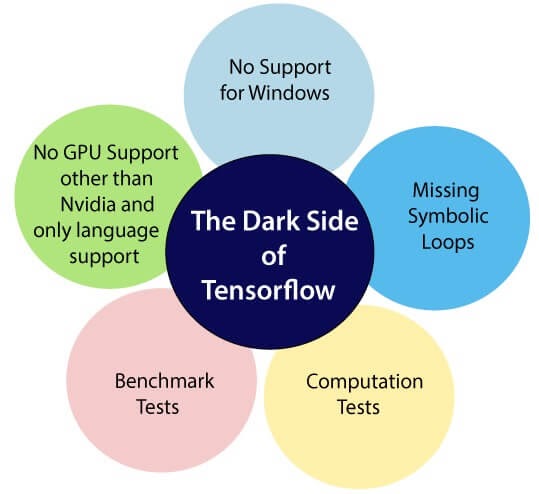
1) Missing Symbolic loops:
When we say about the variable-length sequence, the feature is more required. Unfortunately, TensorFlow does not offer functionality, but finite folding is the right solution to it.
2) No supports for windows:
There is a wide variety of users who are comfortable in a window environment rather than Linux, and TensorFlow doesn’t satisfy these users. But we need not worry about that if we are a window user we can also install it through conda or python package library (pip).
3) Benchmark tests:
TensorFlow lacks in both speed and usage when it is compared to its competitors.
4) No GPU support for Nvidia and only language support:
Currently, the single supported GPUs are NVIDIA and the only full language support of Python, which makes it a drawback as there is a hike of other languages in deep learning as well as the Lau.
5) Computation Speed:
This is a field where TF is delaying behind, but we focus on the production environment ratherish than the performance, it is still the right choice.

Learn TensorFlow Training with Object Detection Concepts By Industry Experts
- Instructor-led Sessions
- Real-life Case Studies
- Assignments
6) No support for OpenCL.
7)It requires fundamental knowledge of advanced calculus and linear algebra along with a good understanding of machine learning also.
8) TensorFlow has a unique structure, so it’s hard to find an error and difficult to debug.
9) There is no need for any super low-level matter.
10)It is a very low level with a steep learning curve.
What is Tensorflow object detection API?
The TensorFlow Object Detection API is an open-source framework built on top of TensorFlow that makes it easy to construct, train and deploy object detection models. There are already pre-trained models in their framework which are referred to as Model Zoo. It includes a collection of pre-trained models trained on various datasets such as the COCO (Common Objects in Context) dataset, the KITTI dataset, and the Open Images Dataset.
As you may see below there are various models available so what is different in these models. These various models have different architecture and thus provide different accuracies but there is a trade-off between speed of execution and the accuracy in placing bounding boxes.
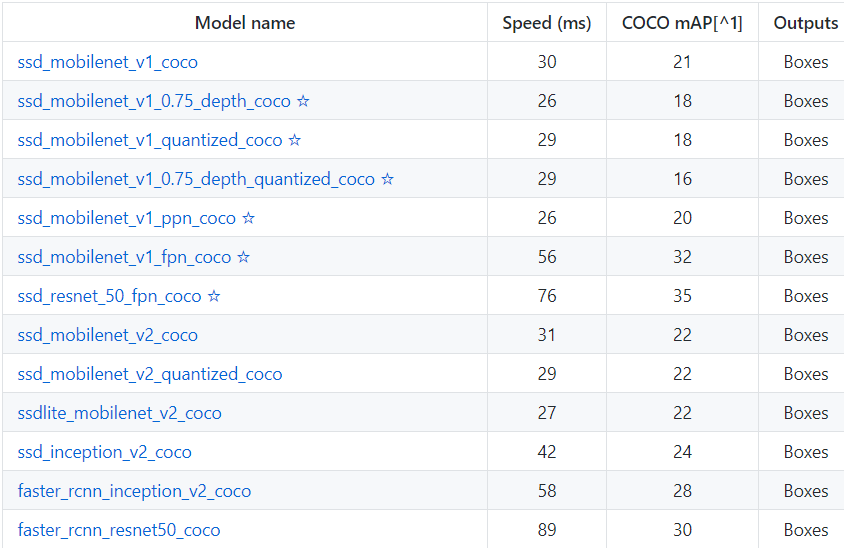
source: Various model available in Tensorflow 1 model zoo
Here mAP (mean average precision) is the product of precision and recall on detecting bounding boxes. It’s a good combined measure for how sensitive the network is to objects of interest and how well it avoids false alarms. The higher the mAP score, the more accurate the network is but that comes at the cost of execution speed which we want to avoid here.
As my PC is a low-end machine with not much processing power, I am using the model ssd_mobilenet_v1_coco which is trained on COCO dataset. This model has decent mAP score and less execution time. Also, the COCO is a dataset of 300k images of 90 most commonly found objects so the model can recognise 90 objects
Object Detection Using Tensorflow
As mentioned above the knowledge of neural network and machine learning is not mandatory for using this API as we are mostly going to use the files provided in the API. All we need is some knowledge of python and passion for completing this project. Also, I assume Anaconda is already installed in your PC.So let us start by downloading some files:
Download Tensorflow API from Github Repository
There are two ways of doing this, one is by using git and another by manually downloading it :
Using git: This is the easiest way of downloading the Tensorflow Object detection API from the repository but you need to have git installed in the system. Open the command prompt and type this command
git clone https://github.com/tensorflow/models
Downloading Manually: To manually download the API, go to this link and click on the code button(in green colour). You can see the download zip option, click on that you will have a compressed file. Now you need to extract the files.
After getting this API in your PC, rename the folder from models-master to models
Setting up a virtual environment
Next, we are going to do is to create a separate virtual environment. The main purpose of Python virtual environments is to create an isolated environment for Python projects. This means that each project can have its own dependencies, regardless of what dependencies every other project has. I am naming my virtual environment as obj_detection but you can name it anything else. Now open the Anaconda prompt and type
To set up the virtual environment:
- conda create -n obj_detection
- To activate it the above created virtual environment:
- conda activate obj_detection
Installing dependencies
The next step is to install all the dependencies needed for this API to work on your local PC. Type this command after activating your virtual environment.
pip install tensorflow
If you have a GPU in your PC, use this instead. You will have a better performance
pip install tensorflow-gpu
Next, use this command to install the rest of dependencies
pip install pillow Cython lxml jupyter matplotlib contextlib2 tf_slim
Now we need to download Protocol Buffers (Protobuf) which are Google’s language-neutral, platform-neutral, extensible mechanism for serializing structured data, – think of it as XML, but smaller, faster, and simpler. Download the appropriate version of Protobuf from here and extract it. After extracting it copy it to the ‘research’ sub-folder in the ‘models’ folders we downloaded earlier.
Now in the anaconda prompt, navigate to the folder containing the protoc file using the cd ‘path of folder’ and run this command
protoc object_detection/protos/*.proto –python_out=.
To check whether this worked or not, you can go to the protos folder inside models>object_detection>protos and there you can see that for every proto file there’s one python file created.
Object detection Code
Now you need to go to the “object_detection” directory inside research subfolder and then create a new python file and paste this code. You can use Spyder or Jupyter to write your code. I would recommend using the Jupyter notebook.
- import numpy as np
- import os
- import six.moves.urllib as urllib
- import sys
- import tarfile
- import tensorflow as tf
- import zipfile
- import pathlib
- from collections import defaultdict
- from io import StringIO
- from matplotlib import pyplot as plt
- from PIL import Image
- from IPython.display import display
- from object_detection.utils import ops as utils_ops
- from object_detection.utils import label_map_util
- from object_detection.utils import visualization_utils as vis_util
- while “models” in pathlib.Path.cwd().parts:
- os.chdir(‘..’)
- def load_model(model_name):
- base_url = ‘http://download.tensorflow.org/models/object_detection/’
- model_file = model_name + ‘.tar.gz’
- model_dir = tf.keras.utils.get_file(
- fname=model_name,
- origin=base_url + model_file,
- untar=True)
- model_dir = pathlib.Path(model_dir)/”saved_model”
- model = tf.saved_model.load(str(model_dir))
- return model
def run_inference_for_single_image(model, image):
- image = np.asarray(image)
# The input needs to be a tensor, convert it using `tf.convert_to_tensor`.
- input_tensor = tf.convert_to_tensor(image)
# The model expects a batch of images, so add an axis with `tf.newaxis`.
- input_tensor = input_tensor[tf.newaxis,…]
# Run inference
- model_fn = model.signatures[‘serving_default’]
- output_dict = model_fn(input_tensor)
# All outputs are batches tensors.
# Convert to numpy arrays, and take index [0] to remove the batch dimension.
# We’re only interested in the first num_detections.
- num_detections = int(output_dict.pop(‘num_detections’))
- output_dict = {key:value[0, :num_detections].numpy()
- for key,value in output_dict.items()}
- output_dict[‘num_detections’] = num_detections
# detection_classes should be ints.
- output_dict[‘detection_classes’] = output_dict[‘detection_classes’].astype(np.int64)
# Handle models with masks:
if ‘detection_masks’ in output_dict:
# Reframe the the bbox mask to the image size.
- detection_masks_reframed = utils_ops.reframe_box_masks_to_image_masks(
- output_dict[‘detection_masks’], output_dict[‘detection_boxes’],
- image.shape[0], image.shape[1])
- detection_masks_reframed = tf.cast(detection_masks_reframed > 0.5,
- tf.uint8)
- output_dict[‘detection_masks_reframed’] = detection_masks_reframed.numpy()
- return output_dict
- def show_inference(model, image_path)
# the array based representation of the image will be used later in order to prepare the
# result image with boxes and labels on it.
- image_np = np.array(Image.open(image_path))
# Actual detection.
- output_dict = run_inference_for_single_image(model, image_np)
# Visualization of the results of a detection.
- vis_util.visualize_boxes_and_labels_on_image_array(
- image_np,
- output_dict[‘detection_boxes’],
- output_dict[‘detection_classes’],
- output_dict[‘detection_scores’],
- category_index,
- instance_masks=output_dict.get(‘detection_masks_reframed’, None),
- use_normalized_coordinates=True,
- line_thickness=8)
- display(Image.fromarray(image_np))
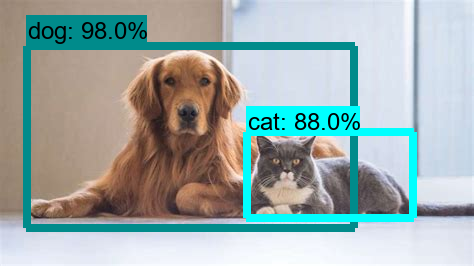
Inside the object detection folder, we have a folder named as test_images. There are two images already in that folder that will be used to test the model. We can put our Images also for which we want to located objects and run the below cells to get the results.
- PATH_TO_TEST_IMAGES_DIR = pathlib.Path(‘models/research/object_detection/test_images’)TEST_IMAGE_PATHS = sorted(list(PATH_TO_TEST_IMAGES_DIR.glob(“*.jpg”)))
- for image_path in TEST_IMAGE_PATHS: print(image_path) show_inference(detection_model, image_path)
Here are some of the predictions on some random pictures I took from Google.
Object Detection using YOLO algorithm
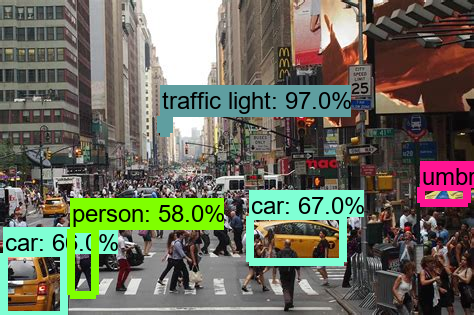
Real-Time Object detection using Tensorflow
The steps in detecting objects in real-time are quite similar to what we saw above. All we need is an extra dependency and that is OpenCV. So to install OpenCV run this command in our virtual environment.
pip install opencv-python
Now just copy and paste this code and you are good to go
Till here everything was the same as the previous section, but now you can see some minor changes. All we do is to get frames from the webcam feed and convert them to Numpy arrays.
- def show_inference(model, frame):
- #take the frame from webcam feed and convert that to array
- image_np = np.array(frame)
- # Actual detection.
- output_dict = run_inference_for_single_image(model, image_np)
- # Visualization of the results of a detection
- vis_util.visualize_boxes_and_labels_on_image_array( image_np, output_dict[‘detection_boxes’],
- output_dict[‘detection_classes’],
- output_dict[‘detection_scores’],
- ;category_index,
- instance_masks=output_dict.get(‘detection_masks_reframed’,None)
- ,
- use_normalized_coordinates=True(line_thickness=5)
- return(image_np)
- #Now we open the webcam and start detecting objects
- import cv2video_capture = cv2.VideoCapture(0)while True:
- # Capture frame-by-frame
- re,frame = video_capture.read()
- Imagenp=show_inference(detection_model, frame)
- cv2.imshow(‘object detection’, cv2.resize(Imagenp, (800,600)))
- if cv2.waitKey(1) & 0xFF == ord(‘q’):
- breakvideo_capture.release()cv2.destroyAllWindows()
Here is the output of the code:
This brings us to the end of this article where we learned how to use Tensorflow object detection API to detect objects in images as well as in webcam feed too. To learn more about computer vision and get a free course about it, click the banner below