
- Cucumber Testing | A Concise Tutorial for Beginners
- Ranorex Tutorial – A Powerful Test Automation you Need to Know
- SOAPUI Tutorial for Beginners | Testing SOAP Services
- Manual Testing Tutorial: Definition Concepts, Types & Tool | Guide to Learn [BEST & NEW]
- Manual Testing Tutorial: Definition Concepts, Types & Tool | Guide to Learn [BEST & NEW]
- Tricentis Tosca | Tosca Automation Testing Tool Online Tutorial
- JMeter Tutorial
- Tools Support For Testing CTFL Tutorial

Ranorex Tutorial – A Powerful Test Automation you Need to Know
Last updated on 10th Aug 2022, Blog, Software Testing, Tutorials
Overview of Ranorex
Ranorex Studio is a powerful GUI Automation Test tool used for testing Desktop, Web and Mobile based applications. It supports the development of automated test modules by the help of standard programming languages such as VB.NET and C#. It recognizes the GUI elements using the company proprietary technology.Object-based record replay can be process by Ranorex recorder which records the user interactions with desktop and mobiles such as mouse movements, touch keys, touch gestures, etc.,
Ranorex supports technologies as per the impulse as follows:
- The desktop supports operations similar to WPF,. NET, WIN32, Java.
- Web operations similar to HTML, Javascript frame, Silverlight.
- Cybersurfer testing for Chrome, Internet Explorer, Microsoft Edge.
- Mobile Operations like Native IOS, Native Android apps.
It’s an easy operation that anon-coder can produce and execute without any difficulties. Applications similar as settings, license, Ranorex workplace, produce a result, Record a test, confirmation, prosecution, and also an illustration design to work.
System settings and license:
To start work with Ranorex, we require you to download and install the tool on our devices.
It supports both 32-bit and 64-bit operating systems. The system settings are simple to understand and the software itself installs the complete packages to work
To get a license to the application, Ranorex provides the 3 types of premium license:
- 1. Node-locked
- 2. Floating
- 3. Runtime
The node-locked and floating license has the same features but floating allows to share one or more users .You are able to run the tests on one or more machines using a runtime permit.
Ranorex Studio
After finishing the system settings and license, I am ready to open the Ranorex Application on the device.
Ranorex Studio provides 3 important views.
- Project view
- Module view
- File view
Project View:
It allows to view all the project files, the Project view contains the Solution KeePass Test suite.It includes one project, libraries, and files required to execute the project.It also allows us to work on a variety of projects in one solution.
Module view:
Module Browser consists of 2 types.
- Groups:
- These are arranged groups which are of two types, one is StartAndLogin and other is SaveAndClose groups with their respective recordings Modules:
- These also consist of 2 types, one is CodeModule which is created and edited by automated engineers and the second is Recordings which are created by the Ranorex
- recorder located in the play station.
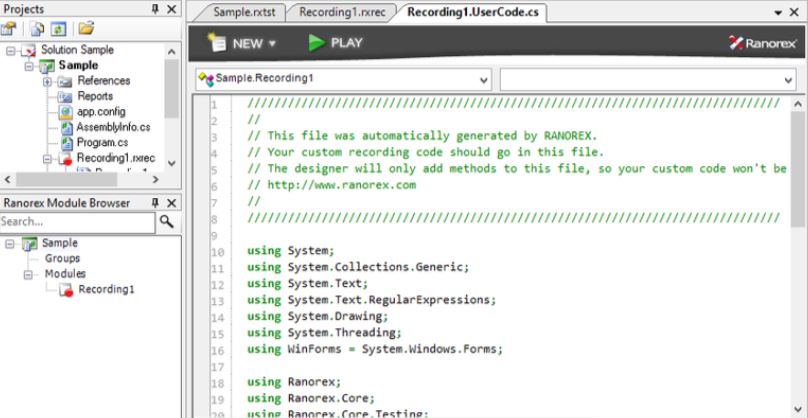
File view:When open a project from the project view or module browser, the associate project files are open in File view .To open the recordings from the module browser, able to see the record action on this view.
Create a New SolutionTo create a new project to get Hands-on-experience with the application.Open the Ranorex Studio, then get the Studio Welcome screen
Basic Data:Solution test name and Location to store the test. Click on the Additional options dropdown, to check the project defaults with the Solution name. Enable the checkbox to make the Solutions files within the directory structure.
Select Application:choose from the Running application or can browse the applications by navigating through browse.
Configure Behavior:
Behaviors which are of 3 kinds. They are:
Focus on a single application:
It ignores all the other applications during test recording except the application in which I want to execute tests.This makes the test simple to run.
Focus on multiple applications:
You may choose from a wide variety of methods to whitelist.
IIt allows devices to communicate between the recorder and any active operations.
Finish:
- It was the end of creating a solution test. Click Finish.
- Module Browser includes 3 modules which are Close the app, Open the app, and a single empty recording.
- There is a single Test case in the Test suite on File view.
- Open the Test suite, see the Setup and Teardown region along with respective modules for the test.
- If you want to run the test, see the Ranorex application automatically closes and opens the application under test.
Record and Validate a test
- Open the Recording 1 module which project file that was already created.
- Click Record. Ranorex studio minimizes automatically.
- The recorder initiates recording the actions done in the application.
- Move the Mouse over the interface of the application to view the indication of the red dot which is recording the actions.
- That is, the Ranorex application denotes the UI elements on test applications.
- Enter name and Submit. the welcome message of name after validation displayed.
- It records the actions on the screen done with the mouse and keys are listed in the recorder.
- The user can delete the actions, add the actions manually, or can change the actions done on the application.
- Then Validate the recordings to check the name entered and it displays the name on the welcome message.
- Click on any UI, select the element window which is to clarify the UI which is selected and click on Next.
Action and Repository
- The files in the project view are arranged in the hierarchy.
- The top one is the Solution of which the project was created before.
- It consists of a test series which has the file extension as .rxtst format.
- The project also consists of the repository which contains the UI elements under the test with an extension as .rxrep format.
- Open the recording in the action editor, will find the repository items which contain the UI elements identified by Ranorex recorder
- If you need to add an action, click on Add new action on the top left of the file view to add an action manually.
- If you need to modify the name, Click at name and change as you wish.
- Repository elements are saved within the application while recording.
- Now click on EDIT IN SPY to verify the path of the element.
- Also edit the repository items in several ways.
- By using the Ranorex application ,Modules are created automatically.
- Use those modules to run the project. Double click on the StartUT module then click Run.
- Check that the application should open. A report appears in the file view with data about the application that was opened.
- Likewise, run all the modules to get the reports.
- To create a test suite in the file view to get executed all the modules at the same time.
- Click on the Test Case to display the entire report details such as test runs, modules, recordings.
- Check the application which is to be tested should not be closed during the time of execution.
Execute a test
Fix a failed test and run:
The test can be failed because of the use of internal data tables and external sources such as Excel files, SQL connectors.Modify the Data and execute the file to get the report successfully.