
- TypeScript Vs JavaScript Tutorial | Learn the Difference
- Web Components in Ionic Framework Tutorial – A Perfect Guide to Refer
- TypeScript Tutorial | A Step-By-Step Guide to Learn
- Creating and Publishing an Android Library | A Concise Tutorial
- How to Link a Style Sheet (CSS) File to Your HTML File | A Defined Tutorial
- HTML Video Tag Tutorial | Learn to Embed Video in Your HTML
- How To Create a Header – HTML Tutorial | The Ultimate Guide
- HTML Lists Tag Tutorial : Step-by-Step Guide for Beginners
- HTML Entity Tutorial | Learn Complete list of HTML Entities
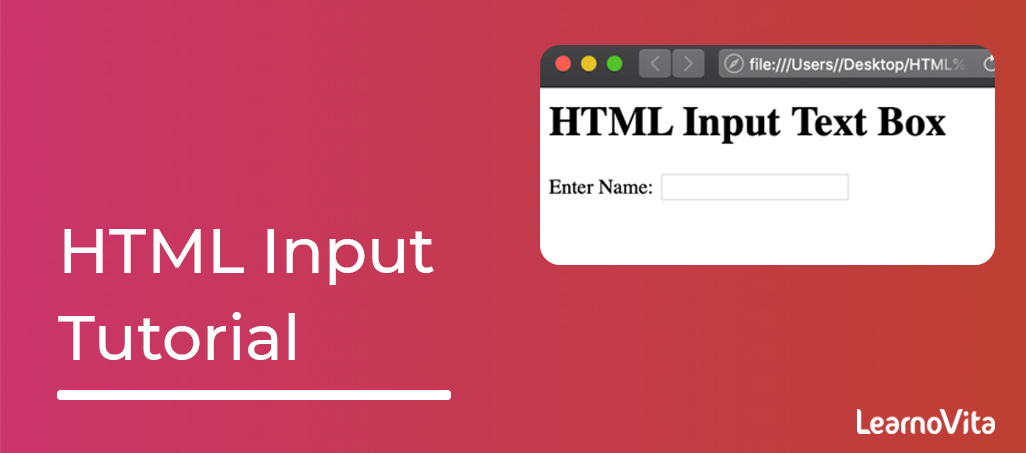
- HTML Input Tutorial | Learn the Forms & Input Tags
- HTML Textbox Tutorial | A Comprehensive Guide
- HTML vs HTML5 Tutorial | Know the Difference
- Know the Difference between HTML vs CSS Tutorial | Complete Guide [STEP-IN]
- Create a Top Navigation Bar using HTML Tutorial | Learning Path – Complete Guide
- HTML – Image Tag Tutorial | The Ultimate Guide for Beginners
- HTML iframe Tutorial | Learn All about Tags and Element
- HTML Semantics – Free Tutorial to learn HTML
- HTML Mailto Attribute Tutorial | A Complete Guide
- Angular Tutorial | A Complete Guide To HTTP & Routing In Angular
- Introduction to HTML Line Breaks Tutorial | Complete Guide
- How to Redirect a Web Page in HTML | Learn in 1 Day FREE Tutorial
- Introduction To HTML Games | Build a Game with HTML Tutorial
- How to Create a Dropdown in Html | The Complete Guide Tutorial For Free
- Creating HTML Table Tutorial | Ultimate Guide to Learn
- How to Create Image Slider in HTML Tutorial | Ultimate Guide
- HTML Symbols Tutorial | For Beginners Learn in 1 Day FREE
- HTML Canvas Tutorial – Learn the Shape, Circle, Gradients
- A Complete Guide | UI Developer (Skills & Resources)
- jQuery Tutorial
- Advanced JavaScript Tutorial
- Angular Js Dom Tutorial
- Angular 7 Tutorial
- AngularJS Installation
- JavaScript Tutorial
- React Redux Tutorial
- AngularJS – Custom Directives Tutorial
- REACT JS Tutorial
- ANGULAR Tutorial
- Augmented Reality And Virtual Reality Tutorial
- Full Stack Development Tutorial
- ANGULAR 8 Tutorial
- TypeScript Vs JavaScript Tutorial | Learn the Difference
- Web Components in Ionic Framework Tutorial – A Perfect Guide to Refer
- TypeScript Tutorial | A Step-By-Step Guide to Learn
- Creating and Publishing an Android Library | A Concise Tutorial
- How to Link a Style Sheet (CSS) File to Your HTML File | A Defined Tutorial
- HTML Video Tag Tutorial | Learn to Embed Video in Your HTML
- How To Create a Header – HTML Tutorial | The Ultimate Guide
- HTML Lists Tag Tutorial : Step-by-Step Guide for Beginners
- HTML Entity Tutorial | Learn Complete list of HTML Entities
- HTML Input Tutorial | Learn the Forms & Input Tags
- HTML Textbox Tutorial | A Comprehensive Guide
- HTML vs HTML5 Tutorial | Know the Difference
- Know the Difference between HTML vs CSS Tutorial | Complete Guide [STEP-IN]
- Create a Top Navigation Bar using HTML Tutorial | Learning Path – Complete Guide
- HTML – Image Tag Tutorial | The Ultimate Guide for Beginners
- HTML iframe Tutorial | Learn All about Tags and Element
- HTML Semantics – Free Tutorial to learn HTML
- HTML Mailto Attribute Tutorial | A Complete Guide
- Angular Tutorial | A Complete Guide To HTTP & Routing In Angular
- Introduction to HTML Line Breaks Tutorial | Complete Guide
- How to Redirect a Web Page in HTML | Learn in 1 Day FREE Tutorial
- Introduction To HTML Games | Build a Game with HTML Tutorial
- How to Create a Dropdown in Html | The Complete Guide Tutorial For Free
- Creating HTML Table Tutorial | Ultimate Guide to Learn
- How to Create Image Slider in HTML Tutorial | Ultimate Guide
- HTML Symbols Tutorial | For Beginners Learn in 1 Day FREE
- HTML Canvas Tutorial – Learn the Shape, Circle, Gradients
- A Complete Guide | UI Developer (Skills & Resources)
- jQuery Tutorial
- Advanced JavaScript Tutorial
- Angular Js Dom Tutorial
- Angular 7 Tutorial
- AngularJS Installation
- JavaScript Tutorial
- React Redux Tutorial
- AngularJS – Custom Directives Tutorial
- REACT JS Tutorial
- ANGULAR Tutorial
- Augmented Reality And Virtual Reality Tutorial
- Full Stack Development Tutorial
- ANGULAR 8 Tutorial
HTML Textbox Tutorial | A Comprehensive Guide
Last updated on 12th Aug 2022, Blog, Tutorials, Website Development
Introduction
Inputs are arguably the most important form of an element.There are more possible input types like checkboxes, radio buttons, select menus, and text boxes that enable users to enter data in various ways.An HTML text box allows a form user to submit their name, username, and other important pieces of information.
TextBox and how it is used?
Text boxes are containers for text that can be customized and also moved around. They are useful for emphasizing or decorating text.Some examples of text boxes.To add a textbox,go to an Insert>Text>Text Box.There are some pre-created Built-in options to choose from.
Definition and Usage:
- The <"textarea"> tag explains a multi-line text input control.
- The <"textarea"> element is often used in the form, to collect user inputs like comments or reviews.
- A text area can hold an unlimited number of characters, and the text renders in the fixed-width font (usually Courier).
- The size of the text area is denote by the cols and rows attributes (or with CSS).
- The name attribute is required to reference the form data after the form is submitted.
- If omit the name attribute, no data from a text area will be submitted
- The id attribute is required to associate the text area with a label.
How to Make a Text Box in HTML:

It’s simple to create a text box in HTML with the <"input"> element.Let’s break the process down step-by-step below.
Step1: Create a label element.
- To start, create a <"label"> element.
- In the opening tag, add a for attribute with a shorthand name a text box.
- For example, set the attribute equal to the “Name”, “FirstName”, or “LastName.”
- Here’s what a HTML might look like so far:
- <"label for="Name"">Name:<"/label">
Step2: Create an input element.
- Next, create a <"input"> element.
- In the opening tag, add a type an attribute and set it to “text”.
- Note that this is a default value.
- Add an ID and name attribute and set both to the same value as the for attribute in a previous step.
- So, for this example, set the name and the ID attributes to “Name.” Here’s the HTML:
- <"input type="text" id="Name" name="Name"">
- The name attribute is needed for any data from a form to be submitted.
- The id attribute is needed to associate an input field with a label.
Step3: Explain any other attributes needed.
- Text inputs support additional attributes, like maxlength, minlength, and placeholder, which can offer important context to users as they fill out a form.
- For example, I need to add placeholder text to the example input field above to denote that I am looking for the user’s first and last name.
- Here’s the HTML side-by-side with a result on the front end.
HTML Text Box Input:
HTML text box input refers to a single-line text field in the form.Can generate one with an input element with a type attribute specified as a “text” or no type attribute specified.Note that the type attribute does not want to be specified since the default type of the input element is “text”.The <"input"> element can be displayed in more ways using various type attributes, like “checkbox”, “date”, “email”, “password”, and “submit”.But when by using the text type attribute or no attribute, a result will look like this:

HTML Textarea:
If you submit a comment on a form, then a single-line text field does not work.Users could submit a comment by a text input field, but most of their answers will be hidden.. Instead, can make a multi-line text field using a HTML <"textarea"> element.The process of making a text area is similar to creating a text box.Generate a <"label"> element with a for an attribute.Generate a <"textarea"> element with an ID and name attribute set to the same value as the for an attribute.Can also specify <"cols"> and <"rows"> attributes to set the size of a text area.
- <"label for="freeform"">Tell us how heard about HubSpot
- <"/label">
- <"br">
- <"textarea id="freeform" name="freeform" rows="4" cols="50"">
- Enter text here…
- <"/textarea">
Text Box Examples:
Below are text box examples with generally specified attributes.Text Box with a Maxlength AttributeTo specify a maximum number of the characters that a user can enter into a text box, must specify the maxlength attribute with the integer value of 0 or higher.If no maxlength is mentioned or an invalid value is specified, the text box has no maximum length.
- <"label for="Name">Name:<"/label">
- <'input type="text" id="Name" name="Name" maxlength="16">
- <"p">Note: Try typing in “Andrea Fitzgerald.”<"/p">
Text Box with Minlength Attribute:
- To specify a minimum number of the characters that a user must enter into the text box, must specify the minlength attribute as an integer value that is not a negative and is at least equal to or lesser than the value specified by a maxlength attribute.
- If no minlength is mentioned, or an invalid value is specified, the text box has a no minimum length.
- Text Box with Placeholder Attribute
- To offer more context about how the user should fill out the text box, can specify the placeholder attribute.
- This should contain a word or short phrase that denotes what kind of information is expected.
Text Box with Size Attribute:
- To set the size of a text box, can specify a size attribute.
- This should be a numeric value of greater than 0.
- If no size is specified, then the text box will be a 20 characters wide by default.
- HTML Form with a Text Boxes
- Below is an example of an HTML form with the multiple input fields, including two text boxes, a password, and submit button, and a text area.
Making Text Boxes in HTML:
HTML text boxes, or single-line text fields, allow the users to submit their name, username, and the other important information in the forms. The best part is that they’re simple to make thanks to the <"input"> element and its various attributes.
Attributes
| Attribute | Value | Description |
|---|---|---|
| autofocus | autofocus | Denote that a text area should automatically get a focus when the page loads |
| cols | number | Denote the visible width of text area |
| dirname | textarea name.dir | Denote that the text direction of the textarea will be submitted |
| disabled | disabled | Denote that the text area should be disabled |
| form | form_id | Denote which form the text area belongs to |
| maxlength | number | Denote the maximum number of characters allowed in the text area |
| name | text | Denote a name for a text area |
| placeholder | text | Denote a short hint that describes the expected value of a text area |
| readonly | readonly | Denote that a text area should be read-only |
| required | required | Denote that a text area is required/must be filled out |
| rows | number | Denote the visible number of lines in a text area |
| wrap | hard soft | Denote how the text in a text area is to be wrapped when submitted in a form |
How to limit the number of characters allowed in the form input text field?
The HTML <"input"> tag is used to get an user input in HTML.To give a limit to an input field, use the min and max attributes, which is to specify a maximum and minimum value for the input field respectively.To limit the number of characters, use the maxlength attribute.The max and min attributes are used with the number, range, date, datetime, datetime-local, month, time and week and input types.
Example:
- <"!DOCTYPE html">
- <"html">
- <"head">
- <"title>HTML maxlength attribute<"/title">
- <"/head">
- <"body">
- <"form action = "/cgi-bin/hello_get.cgi" method = "get">
- Student Name:
- <"br">
- <"input type = "text" name = "first_name" value = "" maxlength = "40" />
- <"br">
- Student Subject: <"br">
- <"input type = "text" name = "last_name" value = "" maxlength = "30" />
- <"br">
- <"input type = "submit" value ="Submit" />
- <"/form">
- <"/body">
- <"/html">
Browser Support:
| Chrome | Safari | IE |
| Yes | Yes | Yes |
| Firefox | Opera | Android |
| Yes | Yes | Yes |
The Properties of a TextBox Control:
| Sr.No. | Property & Description |
|---|---|
| 1 | Font Gets or sets the font of a text viewed by the control. |
| 2 | FontHeight Gets or sets the height of a font of a control. |
| 3 | ForeColor Gets or sets a foreground color of the control. |
| 4 | Lines Gets or sets the lines of the text in text box control. |