- HTML Comments Tutorial | Convert Comments into HTML Codes
- Data Structure and Algorithms Tutorial | Ultimate Guide to Learn
- Gradle Tutorial | For Beginners [ STEP-IN ]
- Encapsulation In Java | Complete Tutorial With Examples
- What is Release Management? | A Comprehensive Tutorial for Beginners
- OOPs Concepts in Java | Learn from Basics with Examples
- The Top Basic Tools of Quality Tutorial | The Ultimate Guide
- Set Environment for C# – Learn How to Setup through this Tutorial
- C# Vs Java Tutorial | Overview and Key Difference
- List of IDEs to run C# Programs | Tutorial for Learning Path
- C Sharp Variables and Constants | The Ultimate Guide
- Unsafe Code in C-Sharp Tutorial | Everything You Need to Know
- Type Conversion Method in C# | A Complete Tutorial
- What Is Synchronization in c# Tutorial | The BEST Step-By-Step Guide
- Understanding Structures in C# | Learn in 1 Day FREE Tutorial
- Strings – C# Tutorial | A Definitive Programming Guide
- Static Keyword in C# Tutorial | Learn with Examples
- Stack Collection in C# Tutorial | A Definitive Guide for Beginners
- C# Sorted List Tutorial with Examples | Learn in 1 Day FREE
- C# Serialization Tutorial | Ultimate Guide to Learn [BEST & NEW]
- Regular Expression in C# Tutorial | Everything You Need to Know
- What is Reflection in C#? | Learn Now Tutorial
- Queue Collection in C# Tutorial | A Definitive Guide
- Properties in C# | The complete Tutorial
- C# Preprocessor Directives Tutorial | Learn in 1 Day FREE
- Polymorphism C# Tutorial | The Ultimate Guide
- C# Operators Tutorial | Learn Arithmetic, Comparison, Logical Concepts
- Namespaces – The complete C# Tutorial
- Multithreading in C# Tutorial | Learn With Examples and Advantages
- Methods – C# Tutorial | A Complete Programming Guide
- Linked List Implementation in C# Tutorial | Ultimate Guide to Learn [UPDATED]
- Introduction to C# Tutorial | Guide for Beginners
- What is Interface in C# | A Defined Free Tutorial
- C# Inheritance Tutorial | A Complete Free Tutorial
- Indexers in C# Tutorial | A Complete Programming Guide
- HashSet Collection in C# Tutorial | Complete Guide Tutorial For Free
- Generics in C# Tutorial | Learn Generic Classes and Methods
- Creating Your First C# Program Tutorial | Learn in 1 Day
- Basics of File Handling in C# Tutorial | The Ultimate Guide
- C# Exception Handling Tutorial | Learn with Best Practices
- Events – C# Tutorial | A Complete Programming Guide
- C# Enumerations Type Tutorial | Learn Everything about Enum
- Dictionary Collection in C# | Ultimate Guide to Learn [NEW & UPDATED]
- Delegates – C# Programming Guide | The Ultimate Guide for Beginners
- Understanding Decision Making Statements in C# | Learn Now Tutorial
- Classes and Objects – C# Fundamentals Tutorial
- C# BitArray Collection Tutorial | Learn in 1 Day FREE
- Attributes in C# Tutorial | Learn to work with attributes in C#
- C# Array Tutorial | Create, Declare, Initialize
- ArrayList Collection on in C# | A Complete tutorial For Beginners
- Anonymous Methods and Lambdas – C# Tutorial | A Complete Guide
- Abstraction in C# Tutorial – Learn the Abstract class and Interface
- Game Development using Unity 3D Tutorial | Ultimate Guide to Learn [UPDATED]
- C++ Reference Tutorial | A Comprehensive Guide for Beginners
- PHP vs Python | Which Is Better For Web Development
- C++ Constructors Tutorial: Types and Copy Constructors
- JavaScript Arrays Tutorial | Complete Beginner’s Guide
- What Is Maven | Maven Tutorial For Beginners
- Spring Tutorial | Perfect Guide for Beginners
- React Hooks Tutorial for Beginners | Ultimate Guide to Learn
- Python for Data Science Tutorial | Quickstart : A Complete Guide
- What is Golang? : A tutorial for beginners | Get started
- Hibernate Validator Tutorial | Learn in 1 Day FREE
- Postman Tutorial for Beginners: API Testing using Postman | A Complete Guide
- Akka Tutorial
- J2EE | Web Development Tutorial for Beginners
- Scala Exception Handling Tutorial | Learn in 1 Day [ STEP-IN ]
- Web development Tutorial
- Visual Studio Tutorial
- PyGame Tutorial
- Python Anaconda Tutorial
- Python Scikit-Learn Cheat Sheet Tutorial
- Mean Stack Tutorial
- Python Requests Tutorial
- Advanced Java Tutorial
- Spring Boot Microservices Tutorial
- Java Servlets Tutorial
- How to Install Pycharm
- Pycharm Tutorial
- Python Version Tutorial
- Python strings
- How to Download Python
- C Data Types Tutorial
- arrays in python
- Python While Loop Tutorial
- JAVA Tutorial
- Loops In C Tutorial
- Java File I/O Tutorial
- Variables in Python Tutorial
- Python Tutorial
- Python Pandas Cheat Sheet Tutorial
- Data Structures Cheat Sheet with Python Tutorial
- Python Tuples Tutorial
- Python If Else Statements Tutorial
- Python Functions Tutorial

PyGame Tutorial
Last updated on 13th Oct 2020, Blog, Software Engineering, Tutorials
What is PyGame?
Pygame is defined (on the official website) as a “set of Python modules” specifically tailored for writing and programming video games. On top of Python’s existing SDL (Simple DirectMedia Layer) library, Pygame adds functionality and optimizes the environment for game creation. Programmers can use Pygame to craft fully functional games and multimedia programs using the Python language.
Aside from being one of the most intuitive platforms for game design, Pygame is also:
- Highly portable
- Capable of running on nearly every operating system
- 100% free and released under the LGPL license
Subscribe For Free Demo
Error: Contact form not found.
Pygame Installing on windows
Installing the Pygame is pretty simple and easy. But the first prerequisite is to Install python 3.7 Installing python on both windows is very easy and straightforward.
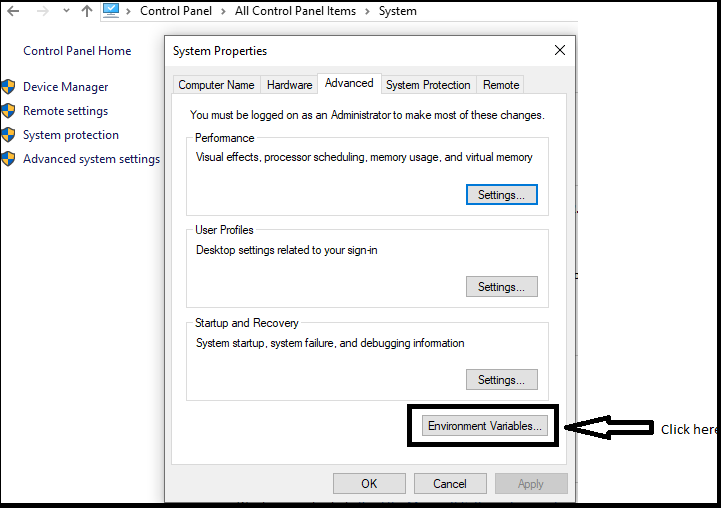
After installing Python, you need to set the path of Python in the system. As follows in the image:
First, we are opening a control panel and click the environment variables:
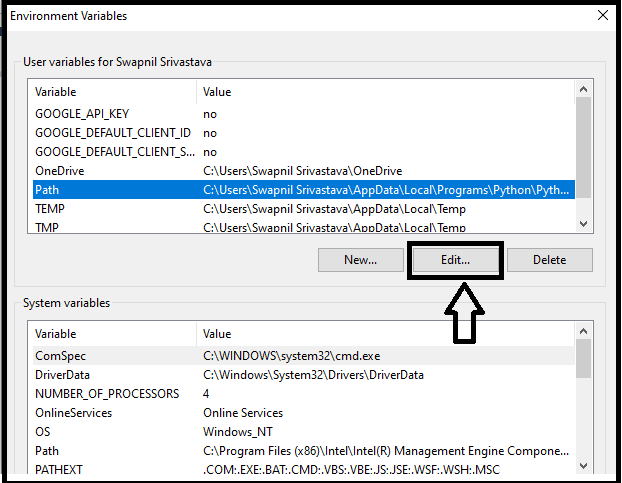
After open the Environment variables, select the path and click the edit button:
Now we click a new button:
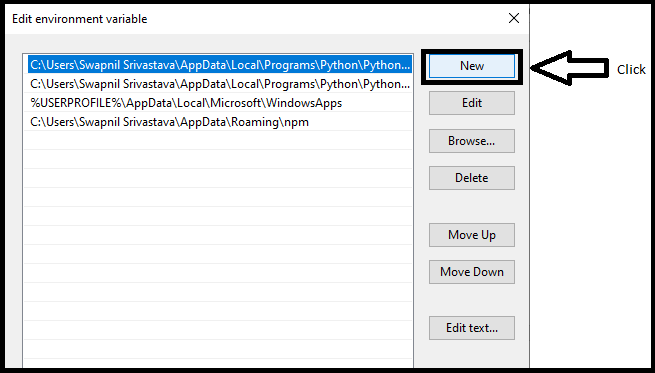
After click new button we copy to the path of Python from c: drive and paste it here:
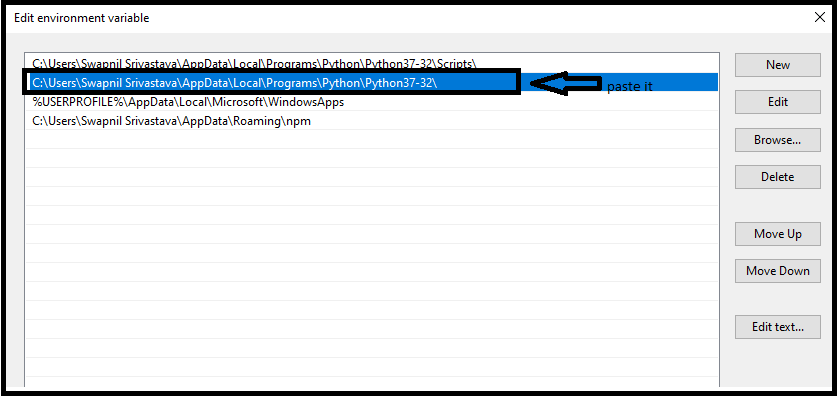
Finally, the path of python has been successfully done.
After setting the way, we need to open a cmd prompt.
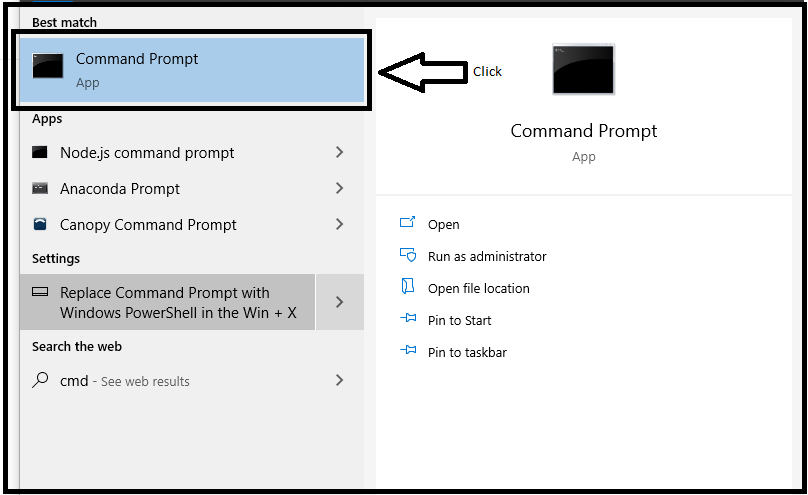
And then type pip command in the cmd prompt.
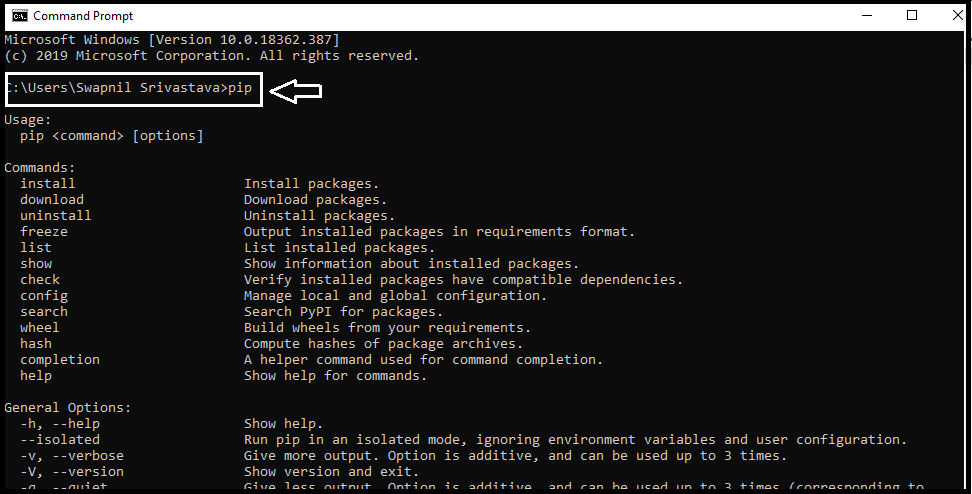
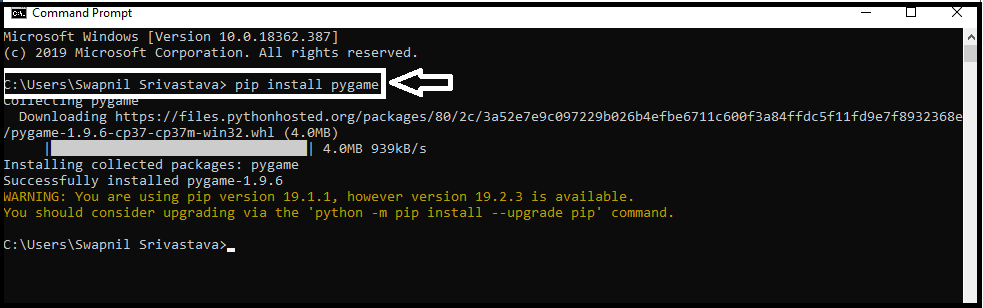
Now type the pip install pygame command here:
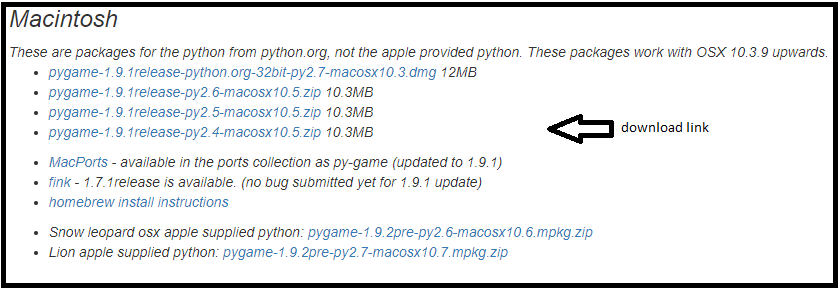
Installation Pygame in Mac:
These are the following steps to install Pygame on Mac OS:
Hit the official site of Pygame pygame.org and, it will display the following window, download pygame-1.9.1release-python.org-32bit-py2.7-macosx10.3.dmg:
1).Doubleclick and unpack the downloaded file. Now double click the unpacked mpkg.zip file that the installer appears to run. Follow pygame installation instructions.
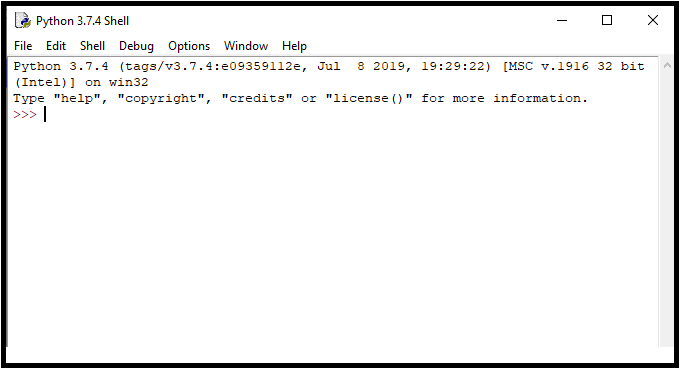
2). Start the terminal (Cmd+Space, then in the search box enter ‘ terminal ‘). Type ‘ python2.7 ‘ into the terminal and click Enter key.
3). Python should start up, showing the version as 3.7.4 (3.7.4 is fine too), and give you a popup. At the Python popup, type import pygame’. If you don’t get any errors, all is good.
As you can see, the Pygame is installed successfully in the system now, and we are creating a simple pygame application.
Initialization and Modules
The Pygame library consists of a variety of constructs from Python, including several different modules. Such modules provide theoretical links to your system’s specific hardware, as well as standardized methods for operating with that hardware. For example, the display enables improved access to your video display, while joystick enables abstract control of your joystick.
After importing the Pygame library in the above case, initializing PyGame using pygame.init() was the first thing you did. This function calls all including pygame modules to the different init() functions. Since these modules are abstractions for specific hardware, this initialization step is required to allow you to operate on Linux, Windows, and Mac with the same code.
Displays and Surfaces
Pygame also includes several Python classes in addition to the modules, which encapsulate the concepts dependent on non-hardware. One of these is the Surface, which determines a rectangular area that you can draw on, at it is purest. In many contexts, surface objects are used in Pygame. You will see later how an object can be loaded into a surface and displayed on the screen.
On a single user-created monitor, which can be a window or a full screen, everything is represented in pygame. The display is developed using the.set mode() function, which returns the visible part of the window to a layer. It is the Surface that you move through drawing functions such as pygame.draw.circle(), and when you call pygame.display.flip(), the contents of that Surface are moved to the display.
Images and Rects
Your basic pygame program has sculpted a shape directly to the surface of the display, but you can also work with the disk images. You can load and save images in a variety of standard formats using the image module. Frames are loaded into items on the surface, which can be manipulated and viewed in many ways.
As mentioned above, rectangles reflect surface objects, as many other pygame objects, such as images and windows. Squares are used so extensively that only to address them is a unique Rect category. In your game, you’re going to use Rect objects and pictures to draw players and enemies and handle collisions. Okay, the idea is enough. Let’s model a game and write it down!
Basic Game Design
It is always a good idea to have some structure in place before you start writing some code. Since this is a tutorial of a game, let’s also model some basic gameplay.:
- The goal of the game is to avoid incoming obstacles:
- The player has to start from the left side of the screen.
- The obstacles enter randomly in the right and move to the left side in a point to point or straight-line manner.
- The player can move from left to right, up to down, and vice versa for avoiding the obstacles.
- The player is not allowed to jump off the screen.
- The game comes to ends when either the player is hit by an obstacle or when the user closes that particular window.
Simple Pygame Application
Write code of blank screen :
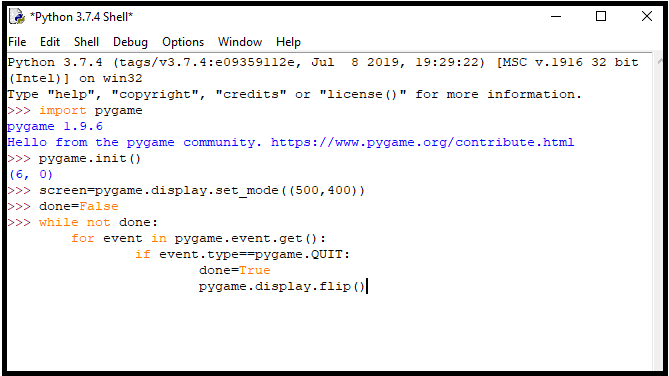
- import pygamepygame.init()screen = pygame.display.set_mode((400, 300))
- done = Falsewhile not done:
- for event in pygame.event.get():
- if event.type == pygame
- QUIT:done = Truepygame.display.flip()
Here you can clearly show syntax :
Import Pygame- This is, of course, needed to allow the Pygame framework.
pygame.init()- This works to Initialize all the modules required for Pygame.
pygame.display.set_mode(width,height)- This will launch a window of the desired sizes. The return value is a surface object you will perform graphical operations on.
pygame.event.get()- This Function empties the event queue if you do not call this the windows message will start to pile up, and your game will become unresponsive in the operating system.
pygame.display.flip()- pygame is double buffered so this swaps the buffers all you need to know is that this call is required for the game to become visible.
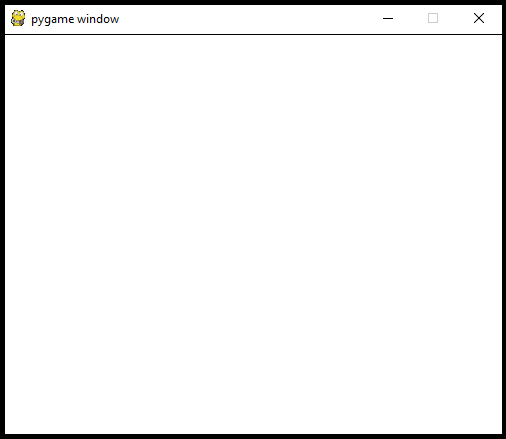
So, what is the result like when we execute the above code? It looks something like this:
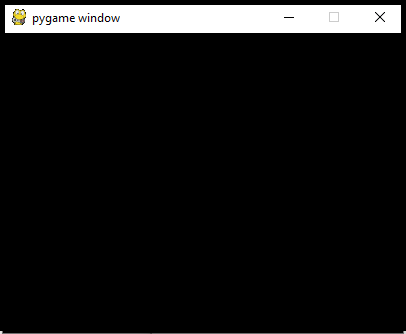
- It looks quite plain. Let’s start adding some stuff to our screen. We can begin by drawing a rectangle. It’s simple, and for this reason, we use pygame.draw.rect.
- As you can imagine, a rectangle will be drawn. This brings in a few points, including the drawing surface, the hue, and the rectangle coordinates/dimensions.#Add this somewhere after the event pumping and before the display.flip()
- Pygame.draw.rect(screen,(0, 128,255), pygame.Rect(30,30,60,60))

Get On-Demand PyGame Training with Instructor-led Classes
- Instructor-led Sessions
- Real-life Case Studies
- Assignments
You can see there are three arguments:
- The 1st argument is the surface instance to draw the rectangular.
- The 2nd argument is the (red, green, blue) tuple that represents the color to draw with.
- The 3rd argument is pygame.Rect instance. The arguments for this constructor are x and y coordinates of the top left corner, the width, and height.
So what is it that we can watch after adding that small piece of code?
Well, here is the output:
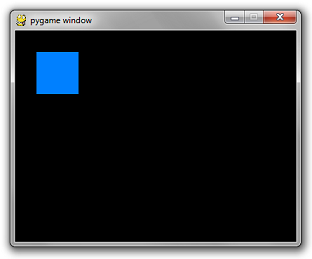
It seems to be nothing fancy just yet. But we can always start somewhere, right?
So next up on this Pygame Tutorial, let us look at how we can make the game more interactive.
Interactivity
A game’s point is being interactive. The close key is the only thing you can play with right now. What’s not a funny game, right? Both events in the user input come through the queue of events. Add more if loop statements add more interactivity to that.
Add the following code before the loop:
- is_blue = True
Modify your rectangular code to pick a color conditionally:
- if is_blue: color = (0, 128, 255)
- else: color =(255, 100, 0)]])
- pygame.draw.rect(screen,color,pygame.Rect(30,30,50,50)) Finally , the very important bit. Add this if statement to your for loop in the same sequence as the other if statement in there.
- if event.type == pygame.KEYDOWN or event.key == pygame.K_SPACE:
- is_blue = not is_blue
So by pressing the space key, it will change the color of the box. Check the following output:

Is it pretty simple right? We need to find out next on this PyGame tutorial how we can add some features to the game.
Adding Functionality
So, our code looks something like this for now. Check it out below:
- import pygamepygame.init()
- screen = pygame.display.set_mode((400, 300))
- done = Falseis_blue = Truex = 30y = 30while not done:
- for event in pygame.event.get()
- if event.type == pygame.QUIT:
- done = True
- if event.type == pygame.
- KEYDOWN and event.key == pygame.K_SPACE:
- is_blue = not is_blue
- pressed = pygame.key.get_pressed()
- if pressed[pygame.K_UP]: y -= 4&
- if pressed[pygame.K_DOWN]: y += 4
- if pressed[pygame.K_LEFT]: x -= 4
- if pressed[pygame.K_RIGHT]: x += 4
- if is_blue: color = (0, 128, 255)
- else: color = (250, 100, 0)
- pygame.draw.rect(screen, color, pygame.Rect(x, y, 59, 59))
- pygame.display.flip()
Check to output when we try to move the rectangle to the right:
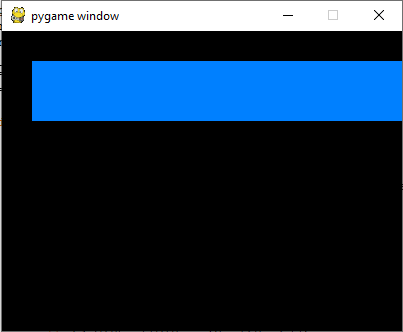
So, was not that what we were expecting, right?
Two things are wrong.
The rectangle from the previous frame remains on the screen each time you draw a rectangle.
It moves really, very fast.
Firstly, you simply need to reset the screen to the black before you draw the rectangle again. There is a much simpler method to do that on Surface called fill that does this. It takes in an RGB tuple.
- screen.fill((0, 0, 0))
Second, each frame’s length is as short as it can be as your super fancy machine. A rational amount such as 60 frames per second needs to reduce the framerate. Thankfully, in pygame.time there’s a simple class called Clock, which will do the same for us. It has a tick method that takes a desired fps frequency.
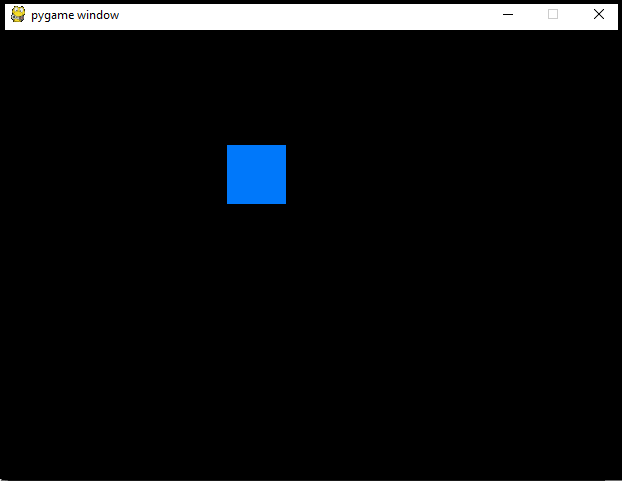
clock = pygame.time.Clock() …while not done:…clock.tick(60)Put it all together and you get:
- import pygamepygame.init()
- screen = pygame.display.set_mode((620, 450))
- done = False
- is_blue = Truex = 35y = 35clock = pygame.time.Clock()
- while not donefor event in pygame.event.get(): if event.type == pygame.QUIT:
- done = True
- if event.type == pygame.KEYDOWN and event.key == pygame.K_SPACE:
- is_blue = not is_bluepressed = pygame.key.get_pressed()
- if pressed[pygame.K_UP]: y -= 5
- if pressed[pygame.K_DOWN]: y += 5
- if pressed[pygame.K_LEFT]: x -= 5
- if pressed[pygame.K_RIGHT]: x += 5
- screen.fill((0, 0, 0))
- if is_blue: color = (0, 120, 250)
else: color = (255, 100, 5) - pygame.draw.rect(screen, color, pygame.Rect(x, y, 59, 59))
- pygame.display.flip()
- clock.tick(60)
Let’s see what is the output of this code:
Next up on this PyGame tutorial we will see how we can work with images and how we can integrate them into our game.
Pygame Surface
The surface of the pygame is used to display any picture. The Surface has a predefined resolution and format of pixels. The color of the surface is black, by definition. By passing the size statement, its size is specified.
Surfaces can have the No. of extra attributes like Color keys, Alpha Planes Rectangle, Clipping, Source, etc. The blit routines will attempt to use the hardware acceleration when possible; otherwise, they will use very improved software blitting methods.
Pygame Clock
Times are displayed in the pygame in milliseconds (1/1000 seconds). Pygame clock is used to find the time. The time is essential to create movement, play a sound, or react to any events. Normally, we don’t count time in seconds. We count it in milliseconds. The clock also provides many functions to help in controlling the game’s fps. The few functions are the following:
tick()
This function is used to refresh the clock. The syntax is the following:
tick(framerate=0)
This method must be called once per frame. It will calculate how much milliseconds have passed since the previous call. The framerate’s argument is optional to pass in the function, and if it is passed as an argument, then the function will get delayed keeping the game to perform slower than the given ticks per second.
tick_busy_loop()
The tick_busy_loop( ) is similar to the tick. (The code will never run more than 20 frames per second by calling the clock.tick_busy_loop(20) Once per frame. The following is the syntax:
tick_busy_loop( )
get_time( )
This function is used to get the previous tick. The no. of a millisecond that isdra is passed in the middle of the last two calls in Clock.tick().
get_time()
Pygame Blit
The process used to render the game object onto the surface is termed as blitting. When someone creates the game object, he needs to render it. If we don’t render the game objects, then it will return the black screen as an output. Blitting is the slowest operation in any game. That’s why we need to be very careful not to blit much onto the screen in every possible frame. The function used in blitting is:
blit()
blit (source,dest,area=None special_flags=0)
This function is used to draw one image into another. The draw can be placed with the dest argument. The dest argument can either be a pair of coordinates as shown in the upper left corner of the source blit()
blit(source,dest,area=None special_flags=0)
This function is used to draw one image into another. The draw can be placed with the dest argument. The dest argument can either be a pair of coordinates representing the upper left corner of the source.
Adding Images
Simply calling the Surface Constructor with a tuple width and height, you can create a blank surface.
- Surface = pygame.Surface((120,120))
This function will create a blank 24-bit RGB image that’s 120 x 120 pixels. The default color will be black. Blitting such an image on a white background will result in this output:
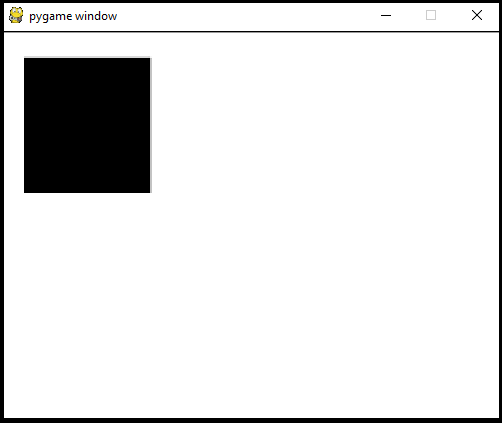
However, you can also include an optional argument in the Surface constructor if you want a 32-bit RGBA photo. Just add the following line in the code: Surface= pygame. Surface((120, 120), pygame. SRCALPHA). This will create a 100x 100 image that’s initialized to transparent.
Rendering such an image on a white background will result in this:
- import pygamepygame.init()
- white = (255, 255, 255)
- height = 527width = 300display_surface = pygame.display
- .set_mode(( height, width ))
- pygame.display.set_caption(‘Image’)
- image = pygame.image.load(r’C:\Python\Python37-32\demo1.png’)
- while True:
- display_surface.fill(white)
- display_surface.blit(image, (0, 0))
- for event in pygame.event.get():
- if event.type == pygame.QUIT:
- pygame.quit()
- quit()
- pygame.display.update() 
check it out the output of the code:

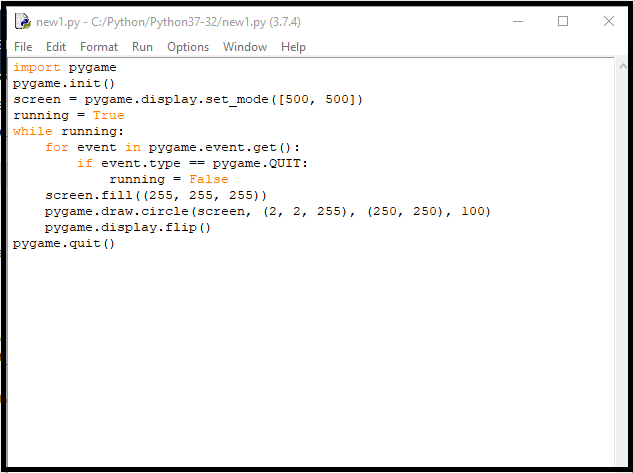
Draw Circle in Pygame
- import pygamepygame.init()
- screen = pygame.display.set_mode([500, 500])
- running = Truewhile running:
- for event in pygame.event.get():
- if event.type == pygame.QUIT:
- running = False
- screen.fill((255, 255, 255))
- pygame.draw.circle(screen, (2, 2, 255), (250, 250), 100
- pygame.display.flip()pygame.quit()
On Python shell the above code will look like below image:
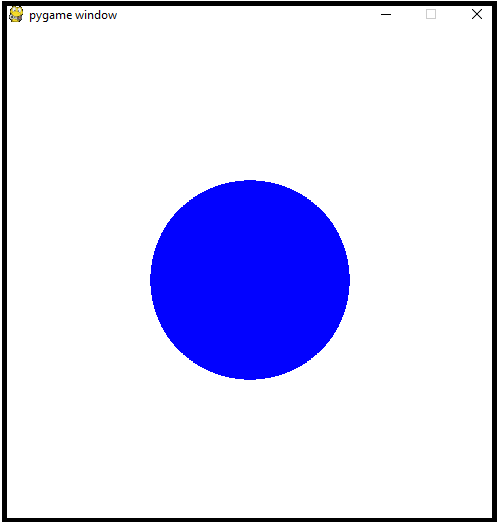
Let us check the output of this code :
Pygame Text and Font
Pygame also offers font and text rendering facilities. By using the pygame.font.SysFont) (feature, we can load fonts from the framework. Pygame comes with the default font built-in that can be accessed by passing the font name or None. There are a number of functions to support the font work.
Pygame.font.Font() generates the font objects. The real font items do most of the fonts job. Normally, font objects are used to render the text in new surface objects. The following are just a few important font functions:
render()
Render function is used to draw text on a new Surface. Pygame has no facility to draw text on the existing Surface. This builds a new Surface with the specified text render on it. The syntax is the following:
Render(text, antialias, color background,=None)size()
This function is used to determine the number of space or positioning needed to render text. It can also be used for word-wrapping and other layout effects. The syntax is the following:
size(bool)set_bold()
The following function is used for bold rending of text. The syntax is following:
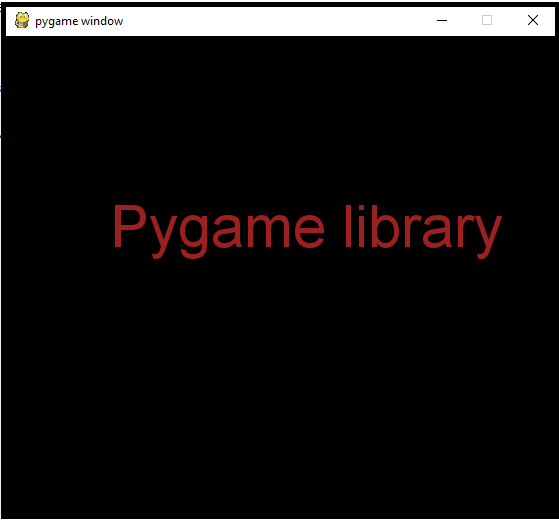
set_bold(bool)Now it is the time to build the code of Text in the below:
- import pygamepygame.init()screen = pygame.display.set_mode((550, 480))done = False
- font = pygame.font.SysFont(“Arial”, 59)text = font.render(“Pygame library”, True, (156, 32, 32)
- for event in pygame.event.get():
- if event.type == pygame.QUIT:
- done = True
- if event.type == pygame.KEYDOWN and event.key == pygame.K_ESCAPE:
- done = True
- screen.fill((0, 0, 0))
- screen.blit (text, (300 - text.get_width()
- // 2, 190 – text.get_height() // 2))
- pygame.display.flip()
Let’s see the output of this code as following:
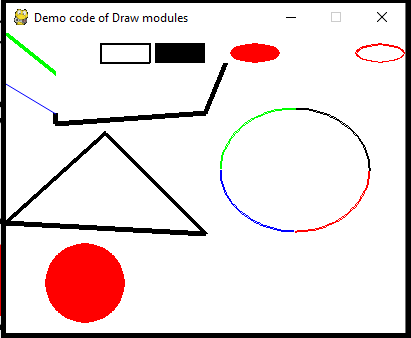
Draw an modules
Parameters:
- surface – Screen to draw on.
- color- This argument is used to color the given shape. The alpha value is optional if we are using a tuple.
- rect(Rect)- Draw rectangular, position, and dimensions.
- start_angle- Start angle of the arc in radians.
- stop_angle- Stop angle of the arc inside the radians.
There are three conditions for start_angle and stop_angle parameter:
- If start_angle < stop_angle, then the arc will be drawn in a counter-clock direction from the start_angle to the end_angle.
- If start_angle>stop_angle then tau(tau=2*pi) will be added to stop angle.
- If start_angle==stop_angle, nothing will be drawn.
Let’s consider an example:
- import pygamefrom math import pipygame.init()BLACK = ( 0, 0, 0)WHITE = (255, 255, 255)BLUE = ( 0, 0, 255)GREEN = ( 0, 255, 0)RED = (255, 0, 0)size = [400, 300]screen = pygame.display.set_mode(size)pygame.display.set_caption(“Demo code of Draw modules”)done = Falseclock = pygame.time.Clock()while not done:
- for event in pygame.event.get():
- if event.type == pygame.QUIT:
- done=True
- screen.fill(WHITE)
- pygame.draw.line(screen, GREEN, [0, 0], [50,40], 5)
- pygame.draw.lines(screen, BLACK, False, [[50, 80], [50, 90], [200, 80], [220, 30]],5)
- pygame.draw.aaline(screen, BLUE, [0, 50],[50, 80], True)
- pygame.draw.rect(screen, BLACK, [95, 10, 50, 20], 2)
- pygame.draw.rect(screen, BLACK, [150, 10, 50, 20])
- pygame.draw.ellipse(screen, RED, [225, 10, 50, 20],)
- pygame.draw.ellipse(screen, RED, [350, 10, 50, 20], 2)
- pygame.draw.polygon(screen, BLACK, [[100, 100], [0, 190], [200, 200]], 5)
- pygame.draw.arc(screen, BLACK,[215, 75, 150, 125], 0, pi/2, 2)
- pygame.draw.arc(screen, GREEN,[215, 75, 150, 125], pi/2, pi, 2)
- pygame.draw.arc(screen, BLUE, [215, 75, 150, 125], pi,3*pi/2, 2)
- pygame.draw.arc(screen, RED, [215, 75, 150, 125], 3*pi/2, 2*pi, 2)
- pygame.draw.circle(screen, RED, [80, 250], 40)
- pygame.display.flip()
Let’s see the output of the code given below: